An availability group supports a failover environment for a discrete set of user databases, known as availability databases that fail over together. An availability group supports a set of primary databases and one to eight sets of corresponding secondary databases. Secondary databases are not backups. Continue to back up your databases and their transaction logs on a regular basis.
Always ON Availability Group technology is based on Mirroring Technology. Availability Group is improved version of Mirroring. Availability Group is a HA (High Availability) and DR (Disaster Recovery) solution.
Prerequisites required to enable SQL Server 2012 Always On Availability Groups
- Dedicated domain user account be created for use by the SQL Server service. This should just be a regular or domain account
- Having separate accounts for SQL Agent service, SSRS, SSIS & SSRS. Having separate account is more secure and resilient, since a problem with one account won’t affect all of the SQL Server Services
- Both SQL & OS Editions, Versions should be at same level on all participating nodes
- Always on availability groups is only supported in Enterprise edition starting from SQL server 2012 ( except SQL 2016 it supports basic availability group in standard edition)
- Recommend to have same collation on all replicas
- Create shared network share on all participating nodes
- Make sure your databases are in Full Recovery Mode, not Simple or Bulk Logged
- Databases included in your AlwaysOn group must be user databases. System databases cannot participate in AlwaysOn Availability Groups.
- Make sure full backups of each of your databases are made prior to installing AlwaysOn
- No cluster shared volume is required for Always on, it can be configured in local disks
- Make sure you have a seperate NIC’s for public and private communication
- Additional NIC is required if you want to isolate always on replication traffic to dedicated NIC
- Make sure you have two free IP’s each for windows cluster IP and Always on listener IP
Note: (Additional Points to consider)
- Nodes in cluster (Ex: here 2 servers) must have drives of the same size and with the same name. There must be the same paths inside the drives. The reason is that; To get a database to SQL Server Availability Group, it is more convenient to have the same drives and paths on the secondary server
- The Windows Cluster Account (Windows Cluster’s name) installed on these 2 servers needs to be granted the Create Computer Object privilege in the OU (Organization Unit) where these 2 servers reside in Active Directory.
- If you do not give Create Computer Object permission to Windows Cluster, you will get an error as below when creating a listener. The WSFC cluster could not bring the Network Name resource with DNS name ‘XXXXX’ online. The DNS name may have been taken or have a conflict with existing name services, or the WSFC cluster service may not be running or may be inaccessible. Use a different DNS name to resolve name conflicts, or check the WSFC cluster log for more information
- Create file share for backups and replicas: If you’ve ever setup log shipping you know you have to have a file share on a server and this is the same for this new feature. Create a file share on one of the servers and give read/write access to all your service accounts. Once clustering is setup, 2012 is installed and configured, we can create our first Availability Group for Always On.
AlwaysOn Availability Groups require a Windows Server Failover Cluster, we first need to add the Windows Failover Cluster Feature to all the nodes running the SQL Server instances that we will configure as replicas
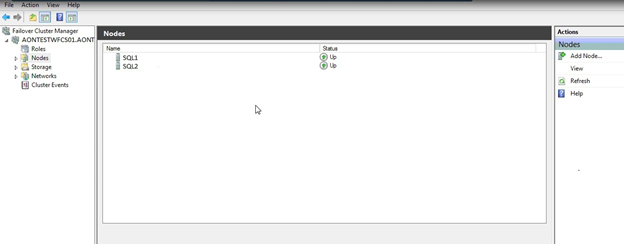
We have two node windows failover cluster SQL1 & SQL2 already setup as shown in below screenshot.
Once you have installed failover cluster we can now proceed with enabling the AlwaysOn Availability Groups feature in SQL Server 2012. This needs to be done on all of the SQL Server instances that you will configure as replicas in your Availability Group.
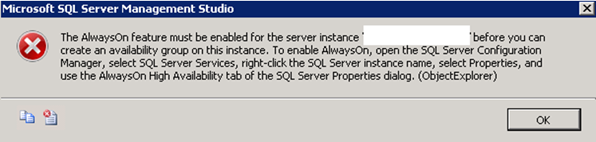
First, we need to enable Always ON Availability Group on two instances. If you do not activate, you will receive an error as follows.
The AlwaysOn feature must be enabled for the server instance” before you can create an availability group on this instance..
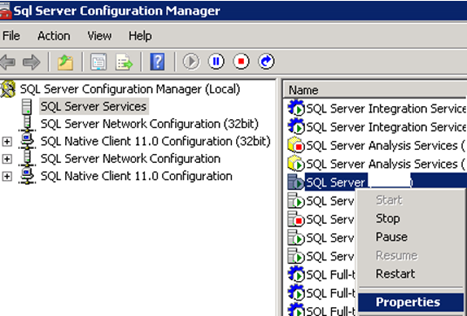
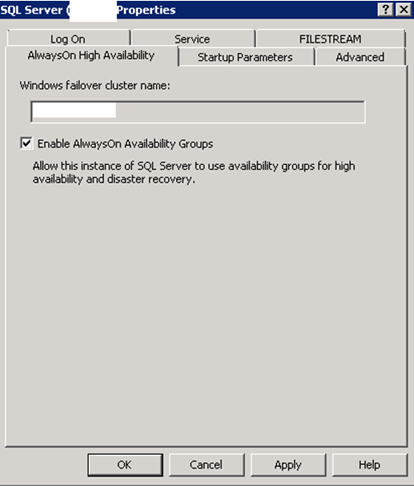
To enable Always On Availability Group, we open SQL Server Configuration Manager with Run As Administrator. In SQL Server Services, we right-click on the instance and click properties.
In the tab that opens, select AlwaysOn High Availability, click Enable AlwaysOn Availability Groups and click OK to activate Always On Availability Group. We need to perform this process on the two servers for Always On Availability Group. This will require a service restart. You can restart your sql server services in a controlled manner.
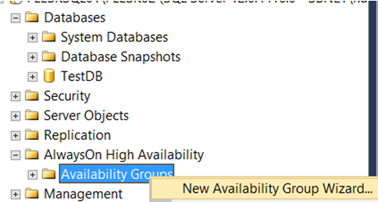
After activating Always On Availability Group in two servers, we click New Availability Wizard from AlwaysOn High Availability on SSMS as follows.
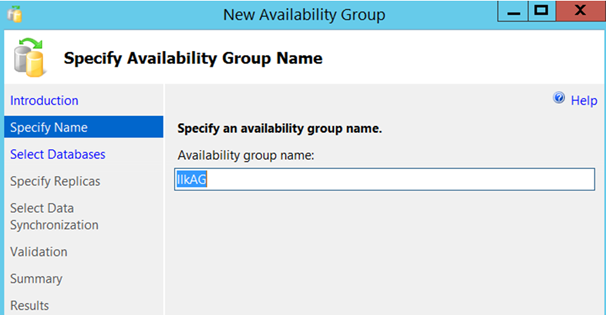
We need to give a name to AG in the incoming screen. I named it “IlkAG”. We’re moving forward by clicking next.
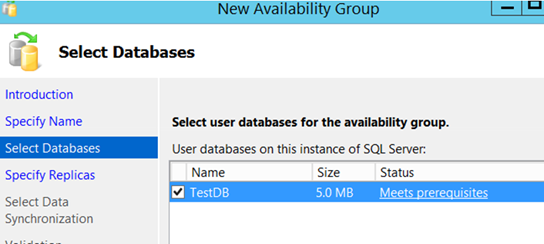
In the incoming screen, we select the databases that we will include in AG. The status of the databases that are suitable for receiving AG appears in the form of “Meets prerequisities”. We’re choosing TestDB.
On the next screen, in the Replicas section, click Add to connect to the second instance of Availability Group. Make sure that the instance names are the same. For example, if your primary server is “Server1\Instance1”, your secondary server should be “Server2\Instance1”. In other words, the name of the named instance on both servers is Instance1.
After the connection is complete, you should see a screen as follows.
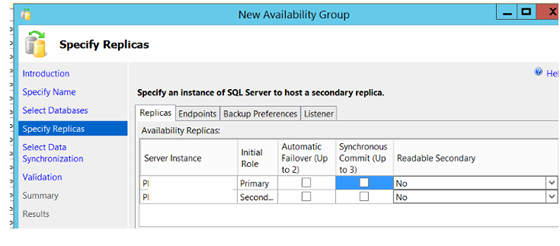
Since we want to set the AG to be synchronous and automatic failover, we mark the required fields as follows.
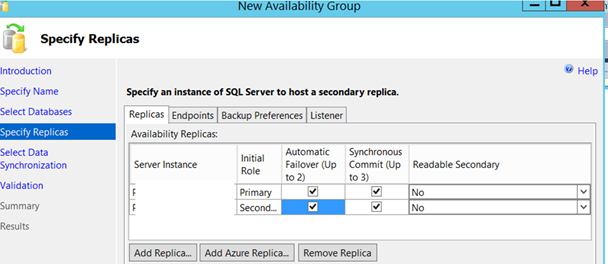
For now, we leave Readable Secondary as “No”.
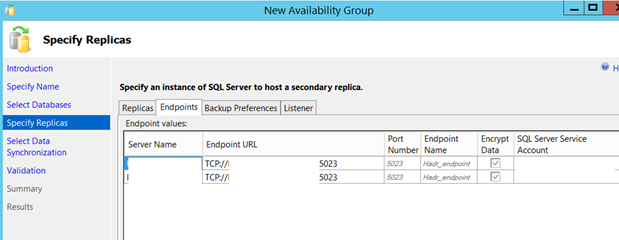
After performing the operations on the Replicas tab, we switch to the Endpoints tab and a screen like the one below is displayed.
.
To set Always On Availability Group, if you use more than one instance on the same server, you will need to use a different endpoint port for each instance. The default endpoint port is 5022.
For example, you have 3 instances. When creating the availability group for the first instance, the default port is 5022. You must change the port from the Enpoint URL when you create a availability group for your second instance. You can use 5023 for the second instance and 5024 for the third instance. We will use port 5023 for the instance in our example.
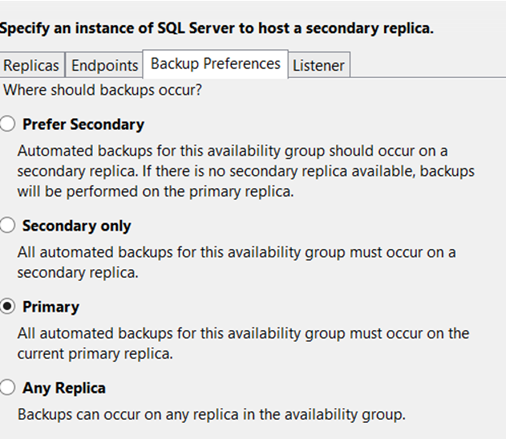
Then we go to the Backup Preferences tab and we see a screen like the following. This screen asks for the preferred instance to get Backups. You must choose one of them.
| Prefer Secondary | If there is an active secondary server, automated backups are performed from the secondary server. If there is no active secondary, it is performed from the primary server. |
| Secondary only | All automated backups must be performed from the secondary server. |
| Primary | All automated backups must be performed from the primary server. |
| Any Replica | Backups can be performed from primary and secondary. |
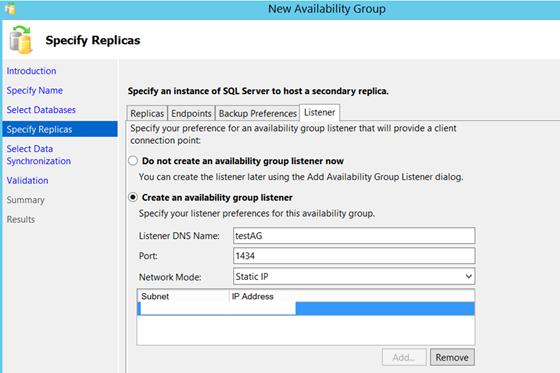
I just select Primary and I’m going to the Listener tab without any further changes.
What is Listener?
There should be minimum 2 instance in Always On Availability Group architecture. The application must always go to the server where the database is active. It is the listener that provides this. Listener has a virtual name and a virtual IP. The application does not know the physical names and physical IPs of 2 servers in the Always On Availability Group architecture. The application only knows the listener name or IP.
When the Listener screen opens, we give a virtual name from the “Listener DNS Name” section as follows.
In the Port section, I give the port information that the application will connect to the databases on this AG. In Network Mode, select Static IP and click Add on the bottom and write my virtual IP. Applicants will know this IP as their database IP.
You can ask your network unit for IP. If you give IP that someone else uses, you will have trouble.
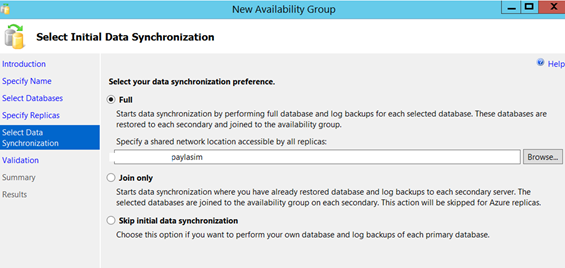
I’m proceeding by clicking Next. In the next screen, it asks us how to do the synchronization with the secondary database in the first stage.
If we choose Full;
It will automatically take the full backup and log backup of each database we selected and transfer these backups to the secondary server itself.
This requires a shared folder. Two instance’s SQL server service accounts must have read and write privileges on this shared folder.
If we choose Join only;
We need to manually take full backup and log backup of each database we selected and transfer it to the secondary server before passing this step.
If we choose Skip initial data synchronization;
We need to manually take full backup and log backup of each database we selected and transfer it to the secondary server.
But we can do this later. I’ve never used this option until now. We’re choosing Full and click next.
On the next screen, necessary checks are performed. If there is a problem, you can solve the problem and click Re-run validation. To solve the problem, you can go back by clicking the Back button and correct the setting you made wrong and click next. There was no problem with our installation.
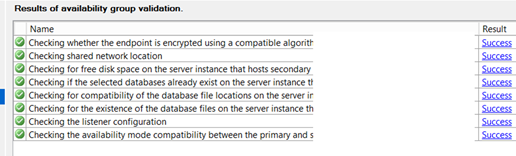
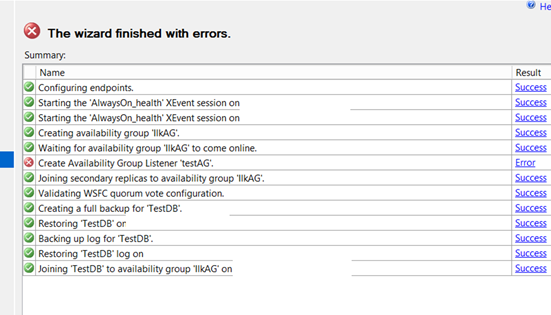
Click Next and then Finish. In my example, everything except the listener was created correctly.
When we click on Error near to ‘Create Availability Group Listener’ testAG ”, we can see the detail of the error as follows.

I usually set the port of the availability group to be the same as the instance’s port.
In our example, I set a different port to see what would happen if we set a different port from instance to the availability group.
You can see the error below.
Creating availability group listener resulted in an error.
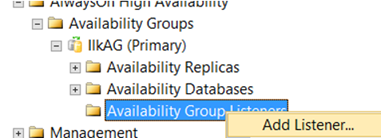
Although it could not create Listener, it created AG. We can define it as described above by clicking Add Listener from the Availability Group Listeners.
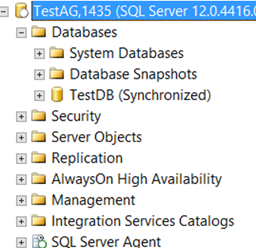
The access information you will give to application developers (the database access information that they write to connection strings) is as follows: TestAG,1435 or “IP address you specify when defining a listener”, 1435
You can also connect via SSMS with this way. After the process is complete, you can see that the database is synchronized.