Virtualization - Cloud

Month: July 2016

Issues encountered post deployment of Netscaler VPX 10.5

Issues encountered post deployment of Netscaler 10.5

Requirement:

Customer imported NetScaler 10.5 VPX to Hyper-v and requested us to configure further configurations

Issue 1:Netscaler URL is not opening over internet

Observations & changes done:

Netscaler has 3 Interfaces ( DMZ, LAN Zone & Loopback)

Netscaler Interface


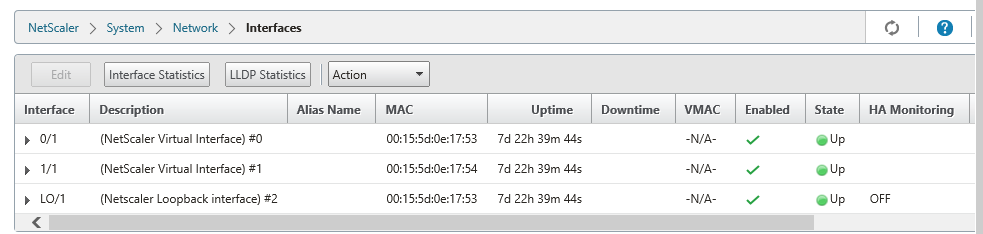
Netscaler IP’s as below

Netscaler IP

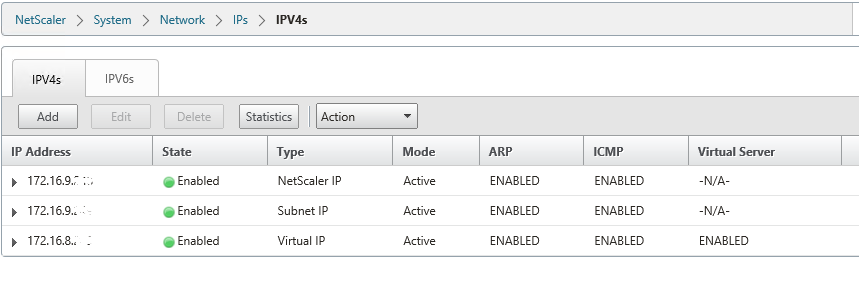
  • 172.16.8.X is DMZ Virtual IP. It should be properly natted to public IP 192.X.X.X, then only Netscaler Access gateway web page will open over internet.
  • Network Team will do internal routes from 172.16.8.X to core switches so that it will reach to Citrix infra servers
  • Note that ,172.16.8.x is the virtual IP which you will configure in Gateway virtual server
  • Make sure that 80(STA Port),443(STA Port) ,1494 & 2598 ports opened bidirectional from Netscaler Virtual IP(172.16.8.X) to Citrix infrastructure servers

After above configurations, netscaler web page opening over internet but observed certificate errors and Authentication issue

Issue 2:

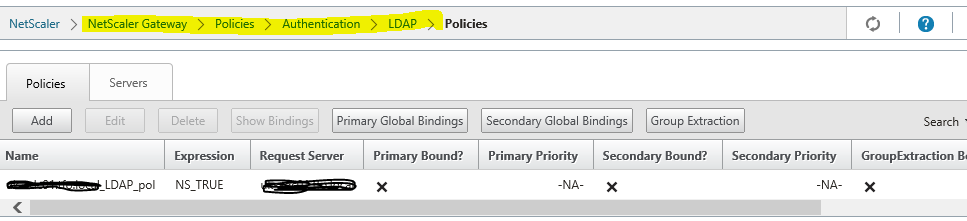
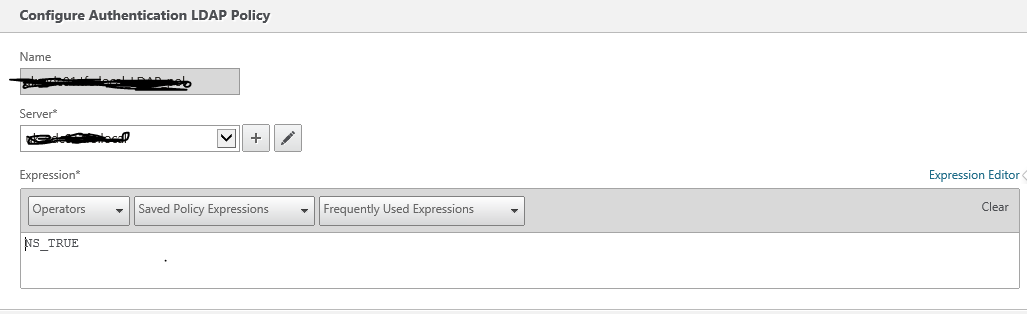
User getting error that the credentials are incorrect when logging to Netscaler

Resolution:

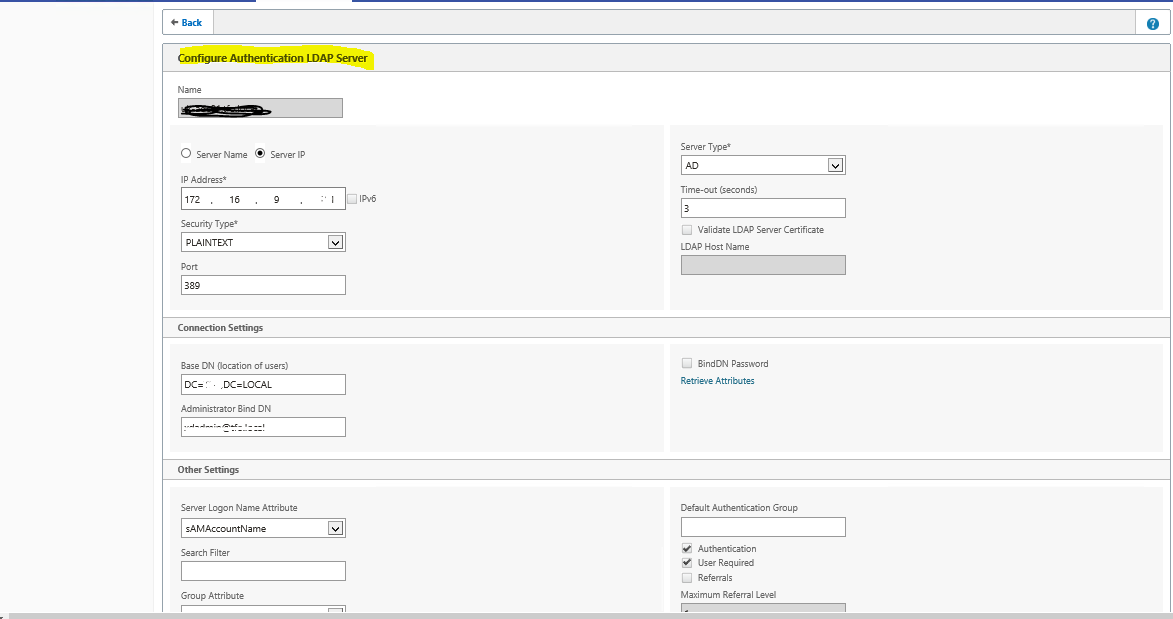
The LDAP configuration was not as per the article http://support.citrix.com/article/CTX108876 correcting which rectified the behavior of incorrect username password.

Netscaler LDAP-1


Netscaler LDAP-2


Netscaler LDAP-3

Issue 3: Certificates errors on Netscaler.

Observations & changes done:

  • Observed intermediate & root certificates are missing in NetScaler which creating authentication issues too..
  • From Client end they are able to get authenticating prompt but not able to get establishing the full session
  • Using the openssl command we have verified that the certificate chain is complete and linked on the VPN virtual server on Netscaler Gateway.
    • # /usr/bin/openssl s_client -connect <ip:port> -showcerts

As per article http://support.citrix.com/article/CTX114146

Issue 4:

VDI launching is working with internal URL and not working externally, throwing VDI error

Observations & Changes done

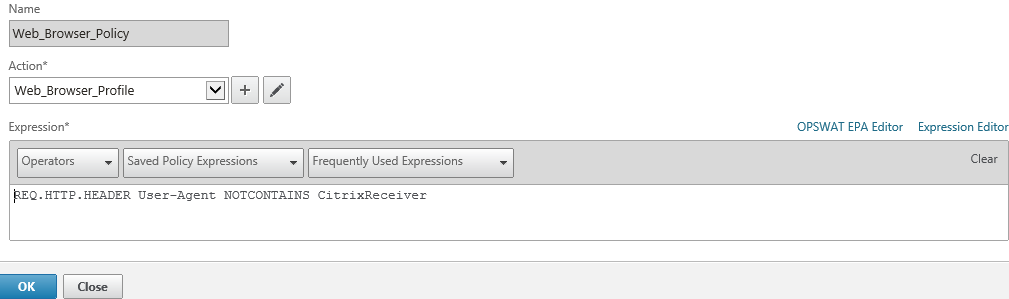
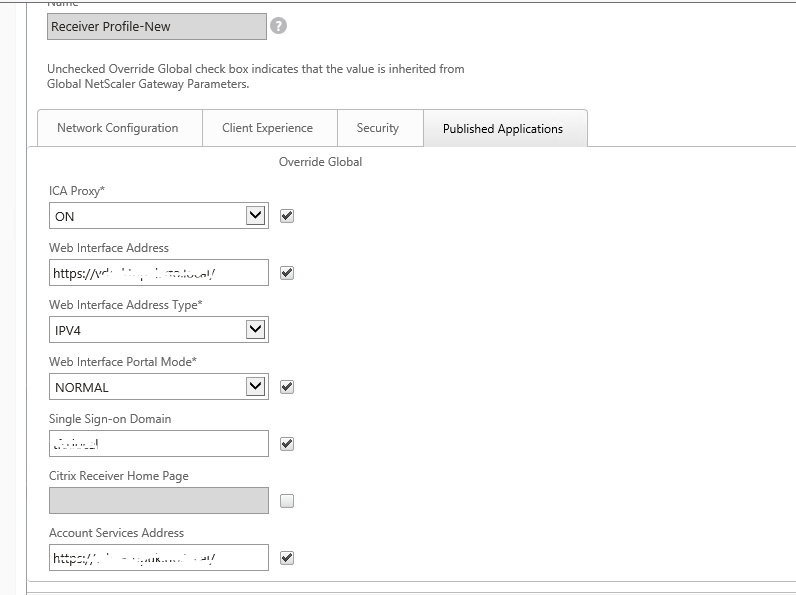
  • Observed session polices were incorrectly configured, created 2 session policies (Web & Receiver Policy)

Using the article http://support.citrix.com/article/CTX139963

Netscaler Session-1

Netscaler Session-2

Netscaler Session-3

Netscaler Session-4

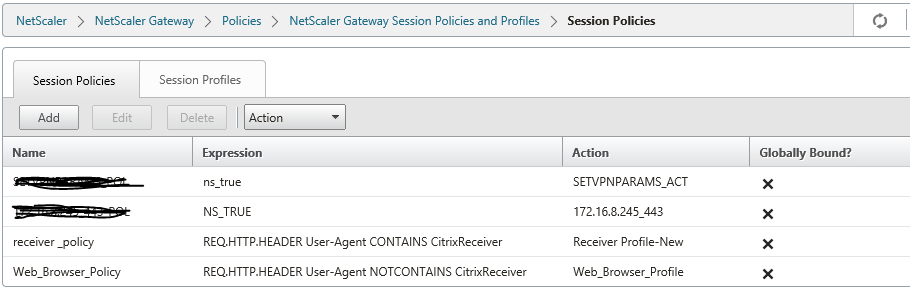
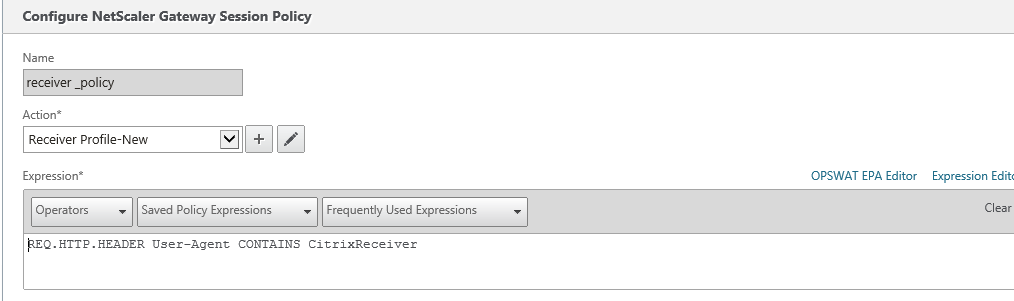
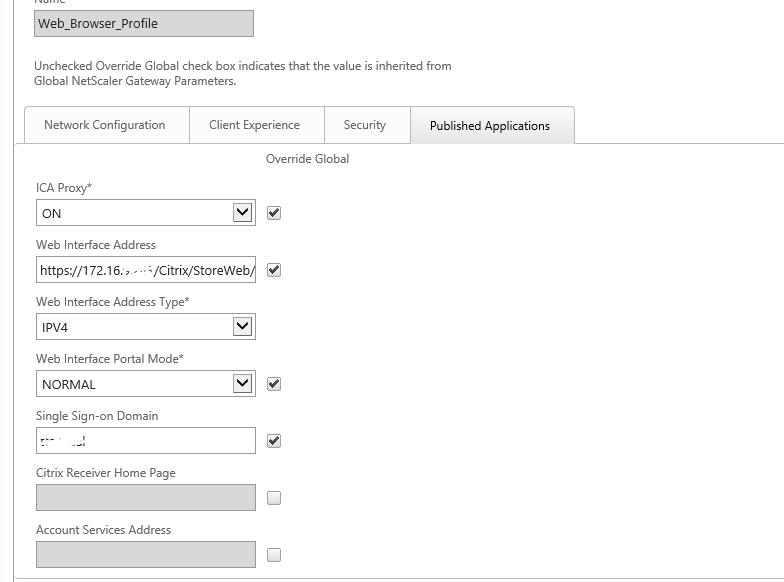
For Receiver, need to configure account services address (Similar to Xenapp Services URL)

Netscaler Session-5

Issue 5:

Error: Cannot complete request, before log into Netscaler webpage and issue is same from internal URL too.

Observations:

  • Load balancing Virtual name(VDIDesktopxx.locaL) is configured in Session profile but these load balancing VIP (SF1+Sf2) were hosted on separate load balancer and there was some issue with load balancing VIP
  • Customer removed Storefront load balancing IP configuration , informing us to point one storefront(SF1) only in Netscaler.
  • Post Load balancing configuration removal, we got the error “Cannot complete request” as netscaler is unable to find the load balance IP

Changes done:

  • Certificate was binded with local load balancing virtual name(VDIDesktopxx.locaL) hence to maintain the same , we created alias entry for SF1 server so that same URL will be accessed internally and the same reachable from netscaler
  • Observed XML was set to false in DDC, recommended to make it true so ran the command set-brokersite -TrustRequestsSentToTheXmlServicePort $true

After doing all above changes, Users are able to launch VDI externally and internally without any issues


XenApp- Applications are unable to launch from DR Web Interface server’s

Issue:

  • Applications are unable to launch from DR Web Interface server’s.

Troubleshooting:

  • Troubleshooting started  with notepad application by mapping to different Xenapp Servers,Web Interface and Zone Data collectors from Pune & Delhi.
  • Issue observed at DR Zone data collector’s(ZDC) as Qfarm /load does not returning any value when we run from both ZDC’s
  • As there is no value returned from ZDC, suspected that ZDC is not contacting database for loading dynamic information.
  • Observed that DR ZDC MF20.dsn(Database connection file) is pointing to the Pune SQL Database – This is incorrect as it is single FARM & FARM database is active in Delhi SQL.

Solution:

  • Reconfigured Pune ZDC02 server to Delhi SQL database  by running the dsmaint config command with new username/password
  • After reconfiguring MF20.dsn file, Zone data collector returning load values when executing qfarm /load and launching applications without any issues

Observations & Recommendation’s :

  • As FARM will connect to only one database , we need to restore the latest backup copy of production database if there is no synch between primary & DR sql servers and reconfigure MF20.dsn during DR Drill -> This is significant step during DR drill
  • SQL mirroring can configure from production to DR SQL Servers to avoid above step.
  • No Hotfixes are installed, need to install hotfix Rollup pack similar to production or latest -> This is critical to avoid known issues

Enabling Jumbo Frames on CISCO UCS blades -Hyperv

How to enable Jumbo Frames for Hyper-v hosted on CISCO UCS blades

Jumbo Frames setting can enable from UCS manager and no need to perform any changes from windows end if servers hosted on CISCO UCS blades

You need to make 3 changes:

  • Set the System Class MTU to 9216
  • Create a QoS policy for the MTU
  • Set the vNIC to have 9000 MTU and QoS policy you have created

To configure Jumbo Frames on UCS it is done as a QoS policy and the configuration guide is in the link below:

http://www.cisco.com/c/en/us/td/docs/unified_computing/ucs/sw/gui/config/guide/2-2/b_UCSM_GUI_Configuration_Guide_2_2/configuring_quality_of_service.html

Whilst you are planning to use Hyper-V as your OS, the following configuration guide is quite useful to understand which components on the UCS you need to configure to enable Jumbo Frames:

http://www.cisco.com/c/en/us/support/docs/servers-unified-computing/ucs-b-series-blade-servers/117601-configure-UCS-00.html

Find the document with screenshots

Document -Jumbo Frames enablement-CISCO UCS

XenDesktop Controller Hotfix Update Procedure

Implementation Plan

  • Take a Full backup of Citrix Databases on server locally and tapes.
  • Take a snapshot of DDC01 (Controller 1)
  • Download and Install Hotfix update 1(CTX135207) on DDC01(Controller 1)
  • Reboot DDC01
  • Test VDI by stopping the services in DDC02 so that session will be established to DDC01.
  • Take a snapshot of DDC02 (Controller 2)
  • Install Hotfix update 1 on DDC02(Controller 2) – Similar procedure of DDC01
  • Reboot DDC02
  • Test VDI by stopping the services in DDC01 so that session will be established to DDC02
  • Observe for 1 week and remove snapshots.

Roll Back

  • Uninstall the component from ARP/Programs and Features.
  • Restore the data store as described in Knowledge Center article CTX135207.
  • Install the desired level of the component (base or other hotfix).
  • Restart the Controller even if not prompted to do so

OR

Revert the snapshot which was taken before installation

Find the document with screenshot in attachment

Document – Xen Desktop7.5 Hotfix Update Installation Procedure

Additional Information

© 2024 Tech Blog

Theme by Anders NorenUp ↑